Saturday, October 15, 2011

taking headstock

One of the things that I won't do on this guitar is to make an abalone name plate for the headstock. I mean, abalone is nice, but I'm not a believer in wearing brands, and I certainly don't want my name at the top of a hand made article. If someone wants to find out who made it they can look inside. Branding is for products. I don't make products.


 The one on the right is one of three or four options that I'm considering for this guitar. I want a lyrical headstock that befits the top of a nice instrument. One that speaks of the things I love in the arts; lines, organic shapes, timber and the reflex curve. Here, the six lined version (current shape) sits to the right of a computer image of the same thing when it only had five lines. I was hoping that the six serendipitous lines would contrast nicely with the straight sharp lines of the strings going from nut to tuners. The lines are inlaid 3 piece purfling. It will look better, that is stronger and more cohesive, when it has been polished.


 Above here is another possibility, a book-matched pair of off-cuts from the back wood. Being so busy visually, I'd leave that completely un-adorned if I choose to go with it for this instrument.


Plan C is to make the headstock out of ebony to match the fingerboard.

I have some evaluating to do.

Friday, October 14, 2011

blocks and clothespegs

 The guitar now has its top and bottom blocks- normally mahogany, but these are Kauri. The top block sits flush with the top of the ribs, but is not as deep as they are, and has an angle planed onto it's bottom edge to accommodate the slope of the back which reduces the depth of the instrument at the neck.
One set of linings are fitted for attaching the soundboard, and here I've used my violin lining clamps made from shortened clothes pegs, also turbo-charged with rubber bands for extra squeeze. It looks a bit untidy, but this is much better than I can do with clothes on a line...

What is interesting, after resisting fretted instruments for so long, but feeling a bit dull and defensive about the effects of global factors on the violin business, is that the energy I'm bringing to this different work is making the workshop sizzle again. It is so important to keep doing something a bit unfamiliar and challenging. Something to make the brain uncomfortable and at the same time happy to be stretched. This is part of the underlying psychology of working creatively alone, and being the only person who brings energy to the business. If I'm not excited by the work, no-one else is going to be excited for me.


Tuesday, October 11, 2011

governing vibrations


I was once asked by a very energetic violinist if I'd make him an instrument that would 'scream like a Banshee' and I said no.
Not because I couldn't, but because to do so would be to make an instrument  disabled in other ways, and one that wouldn't live very long. You can't have maximum brightness and still produce mellow when you need it. Any extra performance in one direction will be at the cost of something else.

The vibration of strings is a bit like the government of people in some systems. The cross brace in a guitar soundboard is like the constitution, laying out the broad principles of operation and in this case it is constructed to resist the upward pull of the bridge by the strings but only as much as is deemed necessary by 'law' to facilitate the free and positive vibration of the strings.

Radiating out from the cross brace are some struts that have spheres of influence over the rest of the unsupported board. These are like the statutes and the law- their strength and shape is regulated by the maker and will have a big influence on the resonance of all parts as a unit.

It is the democratic right of the player to choose which string on which fret, and with however much intensity, the string is excited, but the string can only behave within the constraints laid down to protect the organism from getting too excited and tearing itself apart.


So that is the sort of thing a person like me thinks about when he shapes the bits that make the law of guitar.

beautiful red


dear little chap ran
 out of time but 
looked exquisite even then

Saturday, October 8, 2011

a wonderful adventure in a jibless mirror

I'm a bit slow on the up-take. Every small boat enthusiast has heard of Sandy Mackinnon's voyage in a Mirror dinghy, but I hadn't read the book until just now.

This is the true story (give or take some artistic license) of an impossible trip which is radically under-planned and supremely under-resourced in a totally inadequate piece of equipment, beginning on a river in North Shropshire England, and ending at the blunt end of Bulgaria on the Black Sea. The stuff of every small boat sailor's dreams.

The charm of the book is partly in the self-effacing humor of our lone adventurer, and his capacity to portray the daily improbabilities of his task as minor glitches caused by personal failure, when in reality his blind faith and complete commitment to living out a boyish dream as an adult is an absolute triumph of the adventurous spirit that most of us would dearly love to have, or  never have lost.

This is Wind In The Willows on steroids, with the most charming hand drawn illustrations, and some really powerful and evocative prose smudged within the mishaps. I will really miss this book, and I have been reading it as slowly as dignity will allow...and I'm determined to read it again ( I never do that normally).

It is one thing to take a boat on a wild and exciting adventure, it is quite another to have the ability to tell the story so sweetly and with such humility and humor. 


shaping braces

 The back bracing needed to be shaped and contoured, and this process started with a block plane, then a small brass plane and chisel....


...and then a scraper and abrasive paper from 120-240-320-400-800 grit, then burnished with the back of the paper. I'll probably treat the whole interior with horsetail grass to burnish it further and to impregnate the surface with silica (glass). That would not be a conventional thing to do in guitar making, but I find it advantageous (with deep historical precedent) in violins. The shaping operation is incomplete in this picture.

Thursday, October 6, 2011

calling in the reinforcements

 Most of my violin family instruments have had linings made from best English Willow (recycled from cricket bats). This is a light and resonant timber which also bends and carves very easily. Classical guitars often employ mahogany or Basswood, or maybe Spruce for the linings, and while some makers used un-kerfed shapes steam bent to fit, most seem to use a kerfed profile. Steel stringed guitars nearly all have kerfed linings and that's what I'll do here. Mahogany is a brilliant timber, but supply has a dismal history and I'm interested in alternatives.

The purpose of the lining is to increase gluing surface area at the edges, and while on violin family instruments this is largely because the sides (ribs) are so thin, in guitars it is mainly because of the intrusion into the edges of the bindings that cut a swath through both the sides and the plates.

The pic above shows my linings in the process of being shaped, first with a plane and then rounded with a scraper. These are from an unbelievably beautiful stock of very old (and old-growth) New Zealand Kauri that I have had for years. It was part of a fit-out in the 1940's- mainly cupboard shelving that was being discarded in a building up-grade. It is resonant, absolutely even in density and silky smooth yellow to purple with sparkly accents when cut on the quarter. I love this stuff to bits and really enjoy lifting it to the status of precious jewels when using it. (Kerfing it is a bit annoying really...I'm caught between honouring traditional technique and honouring magnificent materials)
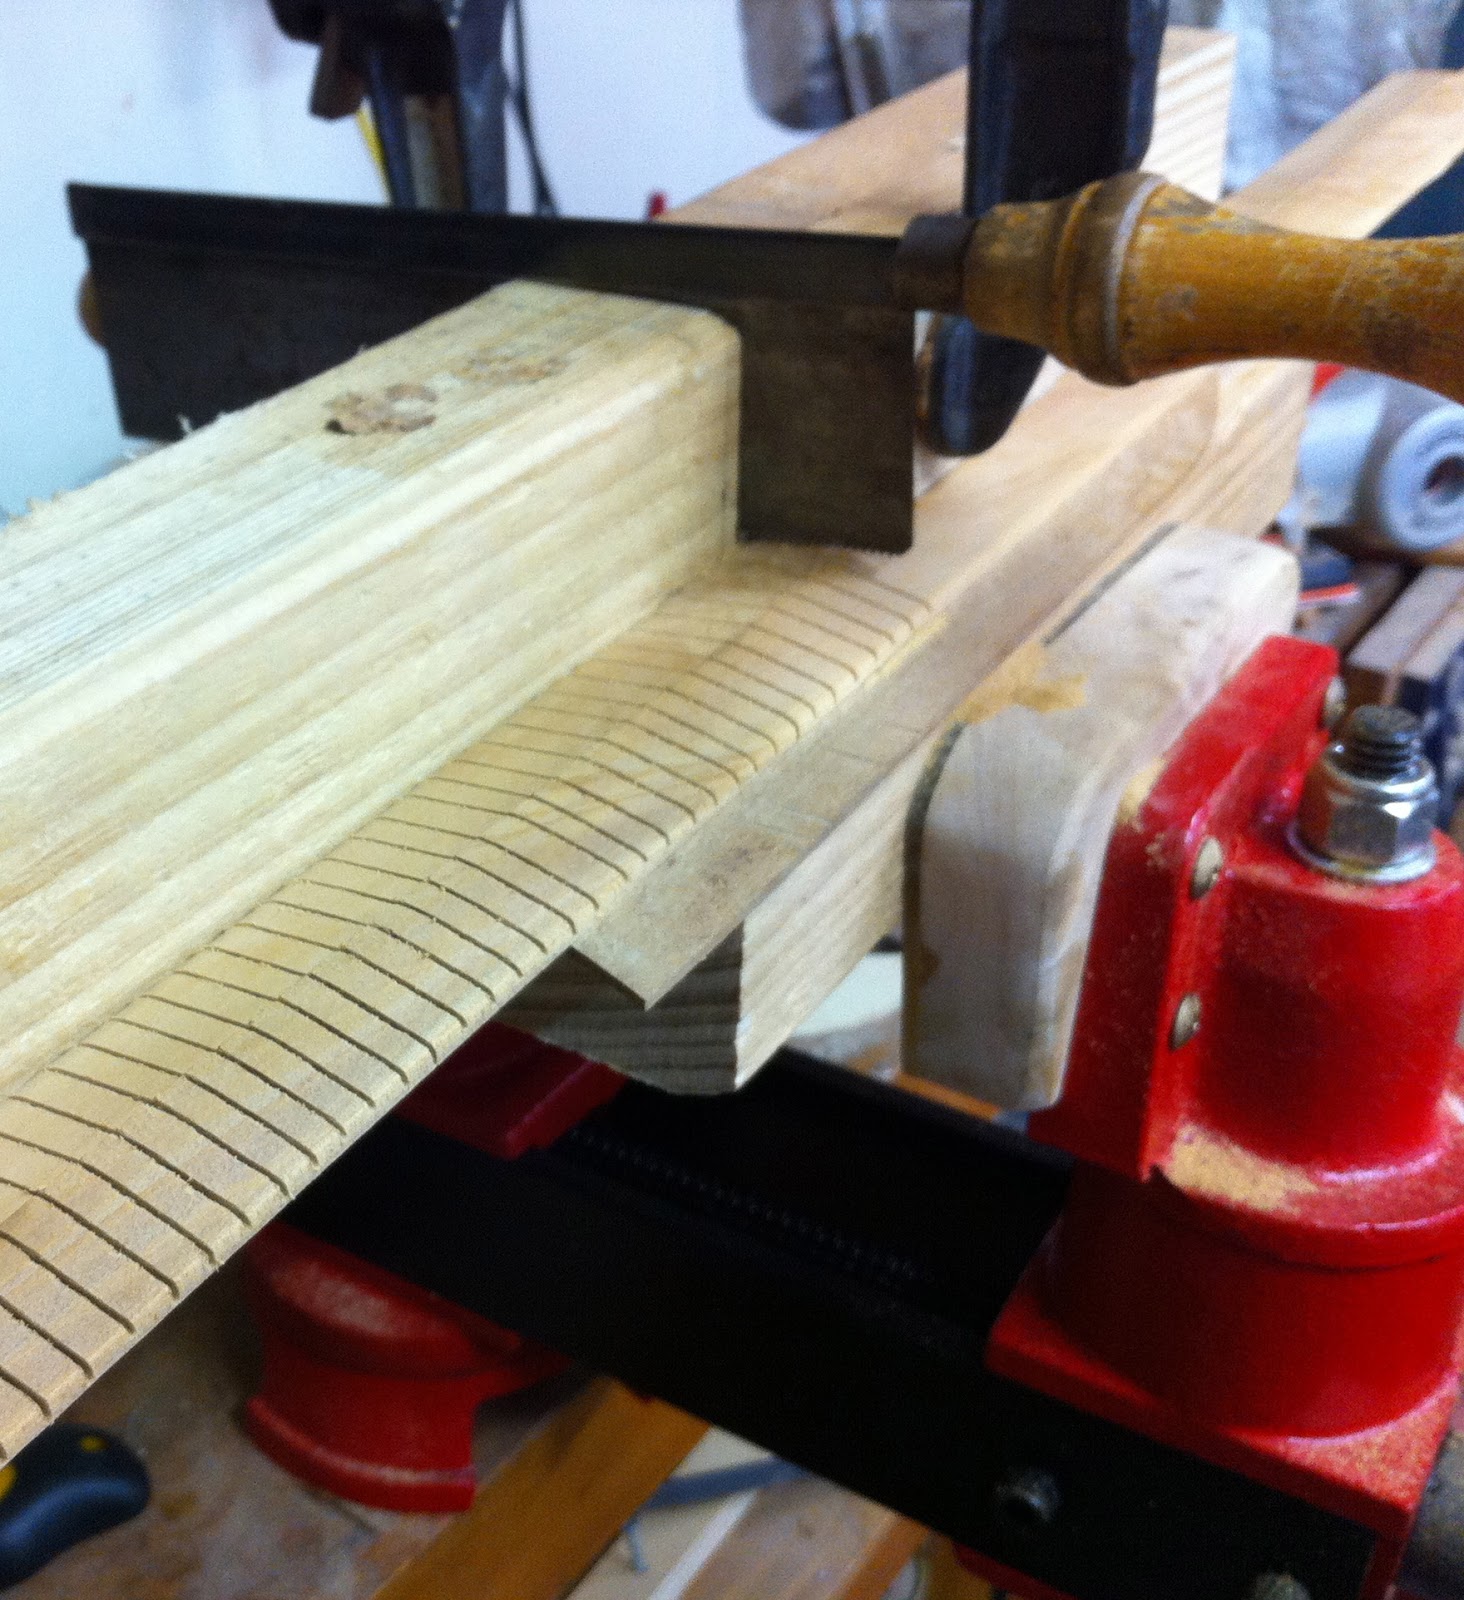
 And here, above is the rather boring and repetitive job of hand cutting the kerfs which allow thick material more easily to take up a complex shape. The pic shows two lengths, bottom edges together, being done simultaneously. You can buy machine kerfed stuff, or use a machine yourself to work faster, but what's the point? There is too much machine work in the average guitar already and an extra hour or two is a nice time to get to know the guts of the instrument.
And here is a shamefully rough shot of the beginnings of the belly, or soundboard bracing. The big cross brace has it's halving joint, and the smaller braces are being assembled and cut to fit the arch and length. I'm hoping that will all look spick and span soon. The soundboard really is EVERYTHING on a guitar, acoustically speaking. It is a little piano soundboard made in miniature, and tuned to hold in your lap.

You might notice the grain orientation in the braces. The grain is vertical, and while there has been argument over whether vertical or horizontal grain is strongest, there is general agreement, I think, that in terms of stability, verticality is king. In any case this is the way it has always been done, and it has worked for the Masters. These braces were planed flat from split flitches, to ensure integrity of the grain. (they are actually split from violin belly wood flitches, split in the Italian Alps in the 1980's....make your mouth water just holding it)

Putting the braces into some sort of tragic perspective, these cost me more than the price of three complete student budget guitars from my local music shop. What I'm doing just doesn't make cents [sic].

Friday, September 30, 2011

no place for socks


A long time ago there was a beginner violin maker who had it in his tiny brain to make an archtop guitar, because he liked the idea of the carved arching that made sense to his violin inclinations, and because it seemed logical from an engineering point of view too.

The idea died rather quickly over a beer with an acquaintance who was a well-known jazz guitarist and very influential guitar teacher, when he confessed that he needed to keep an unspecified number of woolen socks inside his beautiful instrument to make it usable at a gig.

This was not the sort of technical information this luthier was seeking, and the idea was dropped. He (I) couldn't bear to put all that work into questionable acoustics, so just got on with (mainly) making violas etc.

Now this doesn't mean that archtops aren't good or worth pursuing, just that one person's experience as expressed to another person's inexperience changed somewhat, the agenda of the latter.

The pic above is of the sides initially trimmed to the centre line. The black stains on the inside are remnant tannins that made bending hot wet blackwood such a messy business, but it will all be scraped off soon. I used my bending iron which is electrically heated, and the shape is created by covering the wood with a thin 'belt' of steel strapping to keep heat concentrated where it is wanted and to spread the stresses around the curves as they emerged.

I started with the waist bend- this is the tightest- and it is important to let the curve develop as the timber plasticizes with heat and moisture, rather than pulling or forcing a bend. It was all a bit mucky while doing this....and this isn't really inteneded to be a 'how to' blog, but I can photograph the equipment if anyone needs more information about this bit....I guess I have glossed over it rather superficially...

Thursday, September 29, 2011

working all over the place

 Is it all over the place? Or is there method in my madness? The rosette is done, the back has roughed out braces on it, the neck is roughed out the belly braces are split and ready to fit, the sides are bent and waiting quietly in the mold- resting, and watching the chaos unfold around them. Above, the neck has it's groove cut for the truss rod.

Above, the bandsaw is used to rough cut the taper on the neck. Below, not guitar bits at all, but part of an explanation for my work methods.
It is a painting from the late nineteenth Century by Paul Cezanne. In the early '70's this painter was a powerful influence on me at a time when I was also reading early ecologists talking about the relationship of everything to everything else. As I recall, this was referred to at the time as the first law of ecology.

As a painter, Cezanne attempted to reconstruct nature in such a way as to bring everything into harmony with its context- and that normally was a rectangular picture plane. So everything on that plane had a role to play, and nothing existed in isolation. A colour here would relate to a colur there, and a gesture or angle here would be answered somewhere else that was suitable. But one of his central messages was to 'advance the whole canvas simultaneously'.  In other words, don't begin at the start, begin everywhere so that the whole system can be realized together, and each part can be considered consciously and unconsciously as a component of the whole. The idea was that this would bring unity (physically, and in any other context of meaning).

analysis and synthesis

I loved this concept of unity, and I generally work this way still. First analysing the parts, then synthesising them through the craft and the ideas that it is able to carry. Fragment (to understand it) then combine harmoniously (to make it).

If there is ever a chance that we can make things that are really well considered and true  expressions of a set of clear, related ideas, then this is how, as a master of nothing in particular, I try to achieve it. Of course none of this will guarantee good craft or sound technique or even worthwhile ideas, but it is at least considered.

Wednesday, September 28, 2011

can a rosette have meaning?


Can a rosette have meaning? Probably not, but that won't stop me from trying. This simple inlay for the rosette is made from a small piece of blackwood given to me by a venerable old timber miller in the 1980's. He was third generation wood cutter, and his son is fourth, and they've seen some changes in the Otways and Colac/ Camperdown/Cobden areas, and being of a green inclination, I could have been a bit hesitant about their work and their motives, but they were of a different breed altogether from the forest purging-cut-it-all-down type of outfit. They had a vested interest in keeping the trees growing and their livelihoods intact. 

But by the 1990's the big boys with the big contracts and the huge machines had made them all but redundant. Anyway, he gave me this from his woodpile, because he knew that I was one of those silly types that takes a pretty bit of wood and stashes it until I can find a worthy way to give it some dignity, and it might have taken thirty years in this instance, but he was right.

The little block was possessed of a bit of white heartwood along one edge, and I thought I could use it to create an abalone sort of tonal variation, using Otway blackwood on the belly to balance that Tasmanian stuff on the back, and to remind me of a lovely, decent man who really knew the trees.

 Here the pieces are happily assembled on some butcher's paper, with the grooves already cut for the two lines of purfling.


 And looking like something from outer space, the purfling has been glued in above.


And the whole caboodle cut free from the paper that was the stuff that a good butcher once used  for wrapping the chops before supermarkets made butchers into backroom boys putting things into plastic.


Here above, the belly has been routed to accept my little wooden offerings.


And above they have been glued in and are being scraped flat. Now whenever I look at that sound hole there are a whole range of things that I'll be able to think about, little things that link the man I am with the man I was, and some of the people I've admired, and maybe even the man that's trying against all sensible odds to learn how to make a nice noise with a guitar.

Sunday, September 25, 2011

neck stack boogie

 I had a lovely block of fiddle back blackwood- big enough to make two one-piece necks, but the grain orientation wouldn't have been ideal and there would have been a lot of unusable waste....so I decided to split it up. The result is enough to make three necks including pretty headstock veneers.

The stack is shown above, with the scarf already cut on the head. Below the pieces of one neck are aligned roughly as they will be glued. This headstock angle meant that the grafted head piece could be thinner than the neck piece (which will eventually taper towards that end).
 The pic below is of my ancient thicknessing sander. It has done the ribs on nearly every instrument that I've made over the years. It is a bit crude and slow, but I can produce wooden pieces as thin as tissue paper with it. It has an iron tube/roller inside with spiral wound abrasive paper adhered to it. The bottom plate is hinged at the back and adjusted with a screw at the front. A vacuum hose goes in the hole at the top to keep the dust at bay.
 The headstock graft has been glued (below) and the neck piece will be routed for the truss rod before I glue the rest of the stack. I did a bit of side bending between clients to-day, but was covered in black tannins from the timber, and everything was wet, and the phone kept going off, so I didn't photograph the process.

Thursday, September 22, 2011

little arches

The back plate here is getting its final scraping to bring it to my desired thickness. This process was pretty much done before jointing, but a further millimetre or so was removed, first with a toothed blade in a small plane, then with the scraper.
Here the concave workboard for supporting the belly while attaching its struts is in the first stages of being carved. First a template of the desired long arch was made, then a plane was used to create that arch on the plywood. The next shot shows the development of the shape with a small flat plane working mainly at right angles to the centre line to create the cross arched profiles. For the back, the maximum convexity of the plate is only about 3mm. The belly and the back each have their own workboard. A template was made for a major cross arch as well as the long one, just to make sure the shapes were true...the rest was done by feel.
 Some luthiers use a developed radius as the basis of the curved back and belly and there is a lot to be said for the thinking behind that, but I've found great pleasure in looking at and making arches for years now, and I've never found a pure geometric shape to look or perform as well as more complex and perhaps more organic curves and combinations of form.....so my arches will look a little less rigid, and a bit more like a hung chain than the surface section of a sphere. The centre of effort on the plate will have an unequal relationship to the various edges, so in my thinking, it should neither be central nor uniform in all directions.

The centre strip that reinforces the spine is of spruce here, with the grain going across the back. Here it is being cut away to fit the cross braces that will run at right angles to the centreline.

Monday, September 19, 2011

get back

 The timber for the steel string guitar back is from Tasmania- Acacia Melanoxylon (I must check that spelling), anyway it is better known here as Blackwood. I have some from the Otways here in Victoria too. The pic above is of the beginnings of the scraping to check the centre joint. These colours are quite raw in these shots, and are more mellow in reality, and will be much more homogenous when the finish goes on.
 This is the book matched joint, above. The wood under it is for the sides of the instrument. There is plenty of much better commentary on the web about the actual jointing process than I can give here, so I won't spell it all out. Suffice to say that the edges were jointed with a number 7 hand plane, using the plane on its side, running along a flat surface. This is so much easier than jointing violin or cello wood because it is so thin and therefore so much easier to keep the edge from running into a twist.

The gluing was done using clamps to hold the boards down tight on the outside edges while a batten is under the actual joining edges. Removal of the batten supplies the clamping pressure. You need to have something under the edges to avoid gluing the wood to the work board. I used wide masking tape.
This has been roughly sawn to a shape about 5 mm bigger than the final shape. I intend to be restrained in the amount of decoration on this instrument, letting the timber speak for itself- but I have given a bit of thought about the chosen 'composition' of the back grain....that dark centre has something to say about my moods when I'm not making something. I hope the flame might suggest something more subtle and a bit brighter about other bits of the maker too.

Now I have to make some concave surfaced work boards to provide the caul pressure for clamping curved braces and give the back some shape. I'm also tossing ideas around for the belly rosette....I want it simple, but strong, too.

Sunday, September 4, 2011

crossing the fret line

 For years I've always drawn the line at things that have frets. This default position made it easy to deflect guitar repairs, which I was always happy to pass on to a local guitar maker. In fact, before I retrained as a violin maker I had researched guitar making and had even made some templates, and accumulated some information.

There is even some tonewood from 20 years ago that I bought for my first projects. But after starting my little business, I needed to focus on one family of instruments, and other diverse ideas were shelved, and a splendid rationalisation was assembled about not making a guitar.

I've always been a bit intimidated by the plentiful world supply of guitars- we seem to stand knee deep in cheerfully economical ones built with the love and care of workers who have a tiny fraction of the sort of income that we could live on...and this is really starting to bite into the world of violins too.

Everyone wants to feel that they live in a society that has room for people to make a living perpetuating noble historical crafts, it is comforting to have these people around (especially when we want something fixed by a specialist) but not everyone seems willing to support the idea by paying adequately for the work. The GFC, globalisation of the marketplace and the easy purchase without local taxes, of goods from all over the world has the effect of splitting us into two worlds- the doers and the consumers. I'd rather be a doer.

Anyway, I digress into the sort of negativity that disengages readers...There are so many thousands of beautiful guitars in the world it is hard to get excited about making one, but I found myself doing just that, because it is to be for me. The process started with my restoration of the mandolin, but it was a very difficult thing for my fat fingers to learn. My eldest son provided the example though, by having so much wholesome fun learning the guitar as an adult. I began to follow his excellent example, and soon the old "what if" questions began to attach themselves to the bits of wood that I had stored for all these years.
These pics are of the beginnings of an outside mold for my steel stringed acoustic guitar. The top pic shows half molds being shaped with a pattern routing bit on the router table. The bottom pic shows the mold assembled and in the process of being finally shaped.

If there is interest I can blog my progress on this build. It is quite a different process from building a violin, but may be of interest to someone, nevertheless.

Molds are wonderful things and they come in many types. These are some  that I've made over the years.The example above is an outside mold for a violin, typically used by 19th Century French makers. They produce a very accurate rib shape, with tidy and consistent verticality. Because of this, many French beauties lacked the subtle nuance and 'swing' in the contours of Italian instruments that were made on an inside mold, and which allowed the ribs to curve into a slightly convex shape that was ideosyncratic but often breath-taking. By comparison some of the French models produced with this type of mold were clinical and a little too pristine for many eyes. This very characteristic though is what makes the outside mold so suitable for guitar making.....convexity and meandering outlines don't look well on a guitar.


 These viola molds are of the Italian type. Their most notable feature is the shape of the corner blocks.

The two pics above show a collection of half templates and German style violin and one cello molds. These Mittenwald pattern molds have a different block shape, but they have the added value of being easily collapsed while within the assembled soundbox.

Many guitar makers use no fixed mold at all. If the bending of the sides is done accurately, the mold can be redundant - but it does provide a wonderful, strong and reassuring structure to keep everything in the right place while fixing things into it, and shaping edges.

The reason I have chosen to use a mold is that I believe I benefit from producing consistency in designed shapes, learning mainly from nuances in tuning and sound...so a few consistent bodies can develop acoustically from a manageable number of variables. Overall size and shape are then design decisions, not the result of incremental variations in craft.

Wednesday, August 24, 2011

the bush is busiest at both ends of the day


Some of our shy dawn and twilight guests heading down to the gully. They mainly slip past as a mob of a dozen or so, early in the morning or after sunset, and these are the slowest four, or maybe the ones most reluctant to head out of the emerging sunlight.

They arrive like a determined posse of cowboys and they do manage to startle the cows sometimes on their way through. The sheriff in this posse is an enormous buck who stands more than eight feet tall when he wants to look impressive.

I have clearer pictures of the kangaroos, but I include this one because the frosty, fuzzy atmosphere adds to the feeling of them being in the landscape rather than on it; even the curves of the sprung tail relates to the unruly bracken and tufts of grass.

 They move in sync with the emerging shadows, keeping a just pace with the earth's  rotation, in touch with  rhythmic edges of places through time. All through this process, one will sit looking forward and one will sit facing the place they have come from- the prophet and the historian on guard for the movers.