Showing posts with label work methods. Show all posts

Friday, January 26, 2018

The trouble with perfection


One of the members of my workshop group was having the usual difficulties with some small and fine joinery, and her initial question was regarding the difficulties of accurate measurement, but the underlying issue was more searching.

She wanted to talk about the level of accuracy that she could be happy with, and she raised the issue of perfection. I had to start by saying that I don't embrace the search for perfection. I don't think that functional accuracy need be saddled with a striving for a flawless ideal, when inspired and energetic repetition is more likely to bring a quality that is much fresher, human and 'alive'.

We could spend ten years slaving to make a thing perfect or we could make dozens of things in the same period and in doing so we move our skills and our intuitive grasp of craft forward so much more. I'm not saying that big projects are a waste, because big projects are generally collections of little projects. Sometimes though, we need to look at the big goals rather than the problems which are in our faces. For me, making something is more about learning to make than it is about the product, at least if I'm to do more than simply manufacturing.


This attitude is hard to explain and I'm certainly not advocating shortcuts or shoddy workmanship. A really lovely piece of work will often appear easy, effortless and coherent.

If we start a piece thinking that it will only be good in the absence of mistakes we ignore the positive qualities that give rise to that beauty.

A curve, a shape or a cut can be a sweep of the hand that may reveal confidence and energy. This is what I aspire to, and the approach is intuitive rather than logical. And it takes lots of practice to make this kind of progress.

Someone in a hurry to achieve this would do well to use cheap materials as practice platforms for a specific skill, continuing to repeat the process until work can be done with less thinking and more feeling, more confidence and less anxiety about getting it right.

After all, this is precisely what musicians have to do to sound fluid and beautiful. The hands need to be taught how to act without conscious thought to a certain degree, through repetition. This frees the senses to concentrate on more specific perceptions.

Perfection is really akin to Plato's  pet concept in which he argues that our worldly existence can be likened to a shadow cast on the walls of a cave and seen by someone who has never been able to look at the real world outside. If they have only seen the shadows then the shadows seem real, so how can they possibly imagine the 'real' world? That person's shadows are our reality, and Plato wanted us to imagine the ideal world beyond our 'cave' walls. He would argue that everything and everyone has an ideal form and structure (and behaviour?) and we live and create to approach those ideals.

Despite what I've said about perfection for me as a goal in work, I do fit into the idealist mold with regard to life and design- I always feel we can do  things better if we are honest and thoughtful, and when designing something I'm always interested in finding the 'essential' forms and removing the complications that obscure them. Functional modernism is an expression of that.

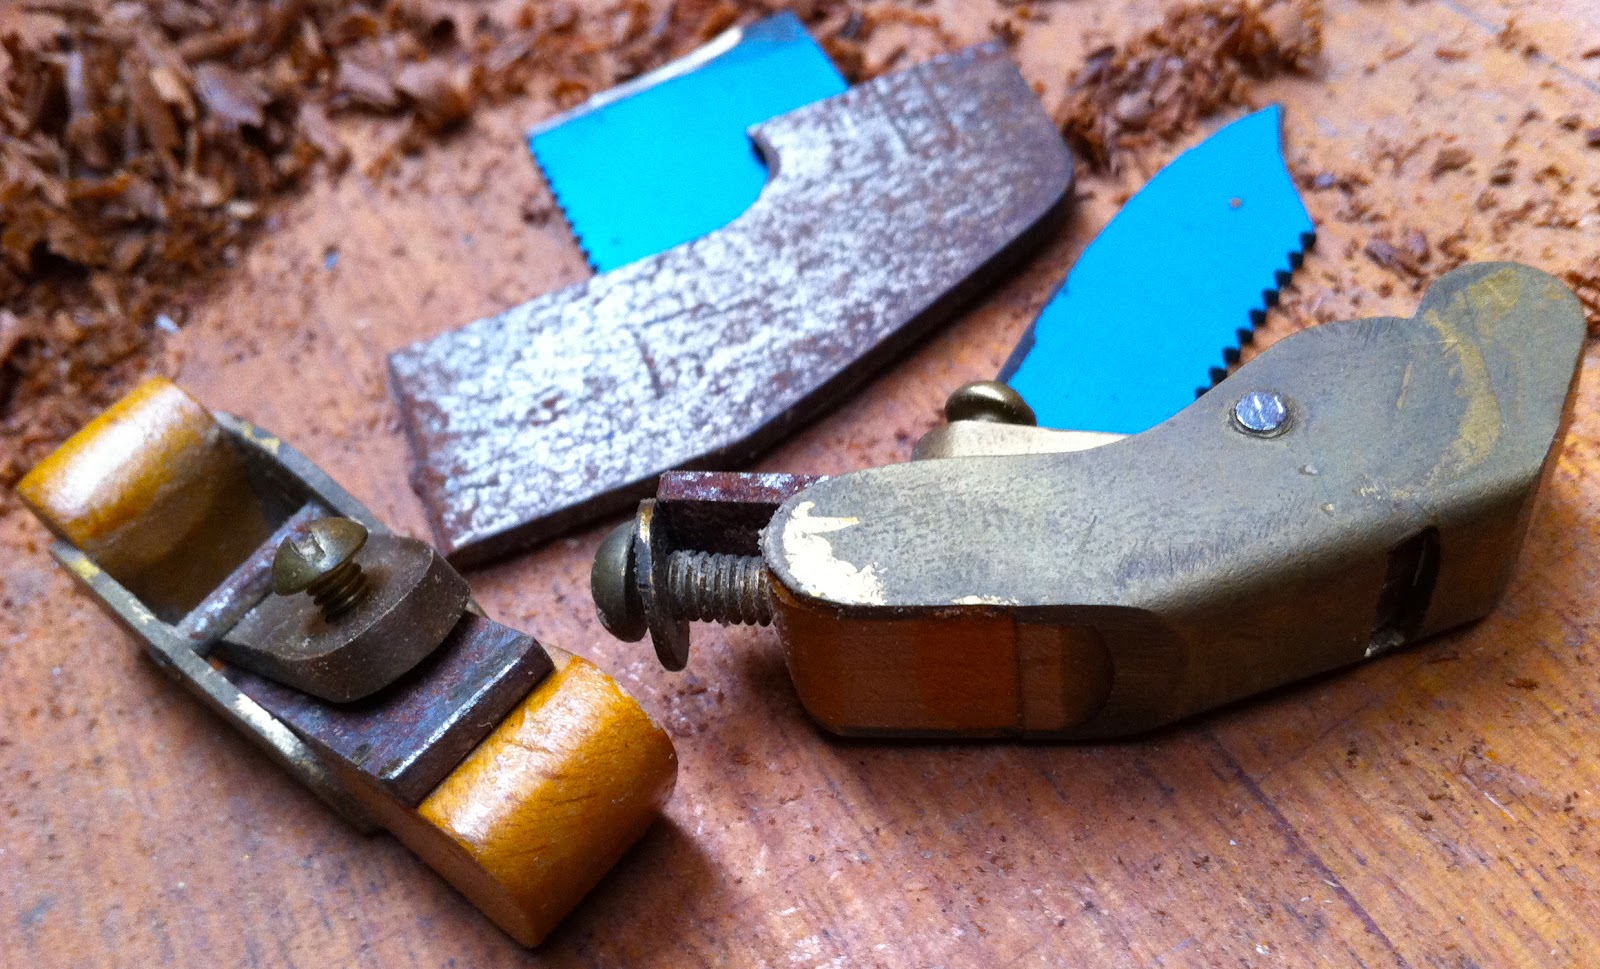
The design for these small planes was very much a conscious attempt to  find an ideal form.


All of this thinking about idealism in design caused me to search out these old drawings from forty years ago in 1978. I wanted to make a methane digester to produce gas for cooking or powering a generator, particularly one that might be useful in agriculture to improve the compost value of animal waste, and to generate gas for domestic or farm use.

At the time there were interesting methane plants in India and China (hotter places, generally), but they were often messy and cumbersome designs that were labour intensive to build and use. That taste for the ideal caused me to try for a more rational design that might be manufactured in stackable modules.

Needless to say this idealistic boy in his 20's had neither the resources nor the money to do anything much with the idea, but I was fascinated with what we then called 'appropriate technology'. I noticed recently there is finally a company producing good manufactured small scale digesters- with the benefit of modern plastics, manufacturing methods and crowd funding. (I'm tempted to buy one)


From 1978, my design for a batch-fed, solar heated Methane digester, manufacturable in concrete. There are other sheets which compute inputs, outputs, volumes and carbon to nitrogen ratios.

thermo-syphoned solar heated water was integrated into the design to maintain an optimum digesting temperature in temperate or cool climates/seasons

On sloping sites the design allowed 'stacking', maintaining the optimum solar angle for that lattitude

I had a concrete company keen to manufacture a prototype, but I had no funds to develop the concept further.


Sunday, October 23, 2011

plane talk about small tools


 Several readers kindly showed interest in reading more about these little tools, so I'll expand a bit here about their development. They are imperfect things made from necessity, so please don't think that I describe them here for any purpose other than a sharing of my limited experience.
 Above and below is where it all started, and these haven't seen the light of day for a long time, and haven't been used since the improved design was produced. My thinking behind these first tries was that the block plane, with its low blade angle, was easy to use on difficult timbers, and I had plenty of that to deal with. They worked well, but weren't any more comfortable than the commercial ones which I could not justify purchasing  at the time due to cost and guilt.

These are one piece of brass for the body, simply folded to become a cradle for the beech wood infill. At the top of the pic above are some bits of blade steel that I have butchered to make blades for these planes.

The point that I missed in these first designs was that a block plane's low angle differentiates itself significantly from a bench plane in having a low centre of gravity, and ease of use with one hand. These are not factors that need consideration in a mini plane. The fact that the bevel is facing upwards in a block plane means that the cutting angle is much higher than would be expected.


So my next design exercise was to take my desired cutting angle (I can't remember exactly the number I settled upon) and design a plane that could :
1. provide some mass to absorb heat.
2. be easily steered with thumb and forefinger and propelled by the second finger from behind.
3. be modifiable for flat or curved bottom shape.
4. be manufacturable by a klutz like me with no real training in these things.

In this shelf unit there are a few ring-ins. Top left and bottom middle are Ibex planes that I bought since doing all this making, just to see if they were any better than mine. They are cheap and very well made- much better made than mine, but they don't work as well, in my hand, anyway. I would recommend them to anyone unable to make their own. I just find them a little bulky and uncomfortable.

 The first of my new design were fabricated from sheet brass again, but without a wooden infill. Jointing was with silver solder. In the photo above the middle two in the top row and the left hand two in the second row are made in this method.

 But then, other people wanted them because they were so handy and portable, but fabrication was way too slow without charging people a fortune, so I wanted to cast some. The pic below if of the most useful of these. This one has a screw for the cap tightening, while some others use a cheese-headed screw. The cheese-head screw might look sexier, but the ordinary one is nice because I can tighten it merely with a twist of the thumb nail.
 The pic above contrasts the same cast plane in two versions- flat and convex bottoms. These ones have rolled tubes as pivot pins for the cap, but early ones had an ordinary nail in there for that job, cut and peened at each end.

The pic below left is of the group that I find most useful, while on the right the underside shot shows the folded and soldered construction of a fabricated one.


Below left is one of the plates of patterns which were placed face down in green sand for casting. The models are made from wood, and the method of manufacture explains why the cast ones have a slightly heftier shape than the fabricated ones. In order to make a successful pattern, the shape has to be tapered away from the plate, or it can't be removed for casting without ruining the impression left in the sand.


Above right, a collection of cast blanks in various stages of finish are waiting for a new life in the wood transformation business. My thinking was that a few spare castings would make it easy for me to continue to develop shapes and ideas, but me being me, as soon as the problems were solved, I lost interest and went off on another spurious adventure, looking for things that I can't do yet.

But I might add (somewhat revealingly) that this behaviour was a direct consequence of a determination to make a more creative life, having nearly lost the one I had. These  were to be the tools of my reconstruction.

When I was at art school at the start of the 1970's, we did life drawing for four hours every week for four years as part of the practical side of the course. The academic side of the course was equally stimulating. In life drawing, the emphasis was on learning to see, but perceive is a more accurate word, and the gestures of the arm and the hand were linked in the brain to the eyes. To describe a form freely we would carve away at the cheap butcher's paper with the charcoal, describing edges with repeated gestures until the shape formed on the page. Hesitant shapes would firm up through repetition and confidence, with the result that an edge would be made from many exploratory lines.

Using these little planes is very much like drawing this way. That is why I find them so satisfying. When you want to reveal a harmonious curve, or a transition (as on the heel of an instrument neck), the plane is the charcoal, linking the brain through the gesture in finding the edge,  volume or  shape. A larger plane removes a flat wide swathe, but these remove long thin ones, so there are lots of arm repetitions and gestures which allow you to feel the shape becoming more refined. The thin line also removes difficult timber with less tear out and resistance.

Did I ever mention that I love nice lines?

Thursday, September 29, 2011

working all over the place

 Is it all over the place? Or is there method in my madness? The rosette is done, the back has roughed out braces on it, the neck is roughed out the belly braces are split and ready to fit, the sides are bent and waiting quietly in the mold- resting, and watching the chaos unfold around them. Above, the neck has it's groove cut for the truss rod.

Above, the bandsaw is used to rough cut the taper on the neck. Below, not guitar bits at all, but part of an explanation for my work methods.
It is a painting from the late nineteenth Century by Paul Cezanne. In the early '70's this painter was a powerful influence on me at a time when I was also reading early ecologists talking about the relationship of everything to everything else. As I recall, this was referred to at the time as the first law of ecology.

As a painter, Cezanne attempted to reconstruct nature in such a way as to bring everything into harmony with its context- and that normally was a rectangular picture plane. So everything on that plane had a role to play, and nothing existed in isolation. A colour here would relate to a colur there, and a gesture or angle here would be answered somewhere else that was suitable. But one of his central messages was to 'advance the whole canvas simultaneously'.  In other words, don't begin at the start, begin everywhere so that the whole system can be realized together, and each part can be considered consciously and unconsciously as a component of the whole. The idea was that this would bring unity (physically, and in any other context of meaning).

analysis and synthesis

I loved this concept of unity, and I generally work this way still. First analysing the parts, then synthesising them through the craft and the ideas that it is able to carry. Fragment (to understand it) then combine harmoniously (to make it).

If there is ever a chance that we can make things that are really well considered and true  expressions of a set of clear, related ideas, then this is how, as a master of nothing in particular, I try to achieve it. Of course none of this will guarantee good craft or sound technique or even worthwhile ideas, but it is at least considered.