
Several readers kindly showed interest in reading more about these little tools, so I'll expand a bit here about their development. They are imperfect things made from necessity, so please don't think that I describe them here for any purpose other than a sharing of my limited experience.
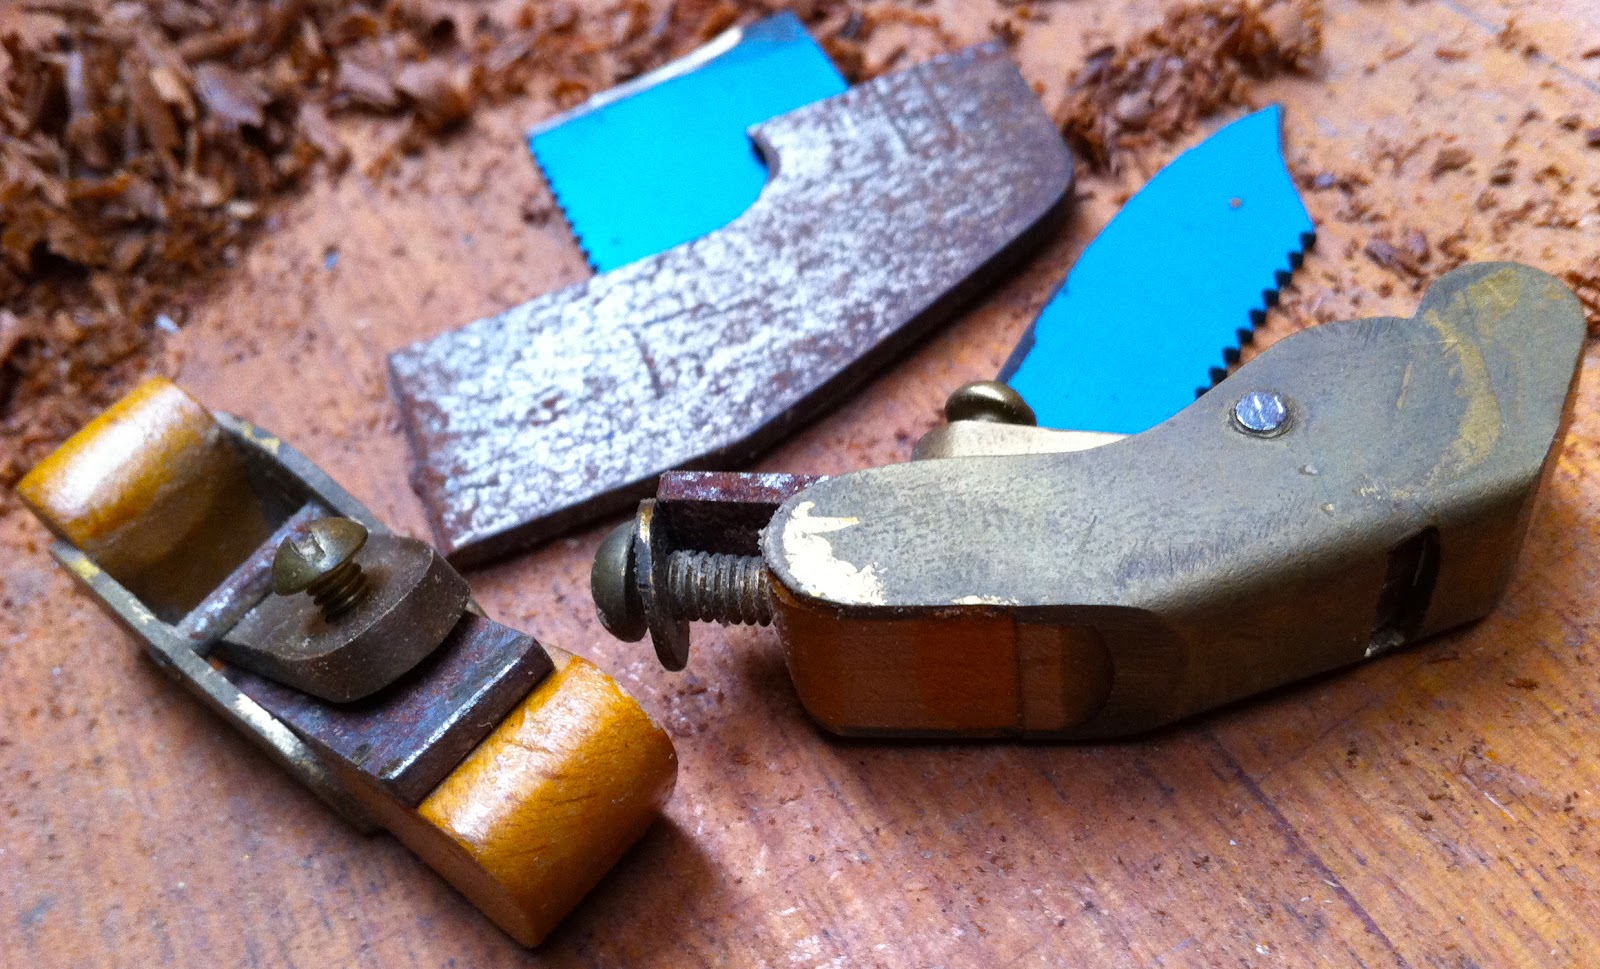
These are one piece of brass for the body, simply folded to become a cradle for the beech wood infill. At the top of the pic above are some bits of blade steel that I have butchered to make blades for these planes.
The point that I missed in these first designs was that a block plane's low angle differentiates itself significantly from a bench plane in having a low centre of gravity, and ease of use with one hand. These are not factors that need consideration in a mini plane. The fact that the bevel is facing upwards in a block plane means that the cutting angle is much higher than would be expected.

So my next design exercise was to take my desired cutting angle (I can't remember exactly the number I settled upon) and design a plane that could :
1. provide some mass to absorb heat.
2. be easily steered with thumb and forefinger and propelled by the second finger from behind.
3. be modifiable for flat or curved bottom shape.
4. be manufacturable by a klutz like me with no real training in these things.
In this shelf unit there are a few ring-ins. Top left and bottom middle are Ibex planes that I bought since doing all this making, just to see if they were any better than mine. They are cheap and very well made- much better made than mine, but they don't work as well, in my hand, anyway. I would recommend them to anyone unable to make their own. I just find them a little bulky and uncomfortable.


The pic above contrasts the same cast plane in two versions- flat and convex bottoms. These ones have rolled tubes as pivot pins for the cap, but early ones had an ordinary nail in there for that job, cut and peened at each end.

The pic below left is of the group that I find most useful, while on the right the underside shot shows the folded and soldered construction of a fabricated one.


Below left is one of the plates of patterns which were placed face down in green sand for casting. The models are made from wood, and the method of manufacture explains why the cast ones have a slightly heftier shape than the fabricated ones. In order to make a successful pattern, the shape has to be tapered away from the plate, or it can't be removed for casting without ruining the impression left in the sand.


Above right, a collection of cast blanks in various stages of finish are waiting for a new life in the wood transformation business. My thinking was that a few spare castings would make it easy for me to continue to develop shapes and ideas, but me being me, as soon as the problems were solved, I lost interest and went off on another spurious adventure, looking for things that I can't do yet.
But I might add (somewhat revealingly) that this behaviour was a direct consequence of a determination to make a more creative life, having nearly lost the one I had. These were to be the tools of my reconstruction.
When I was at art school at the start of the 1970's, we did life drawing for four hours every week for four years as part of the practical side of the course. The academic side of the course was equally stimulating. In life drawing, the emphasis was on learning to see, but perceive is a more accurate word, and the gestures of the arm and the hand were linked in the brain to the eyes. To describe a form freely we would carve away at the cheap butcher's paper with the charcoal, describing edges with repeated gestures until the shape formed on the page. Hesitant shapes would firm up through repetition and confidence, with the result that an edge would be made from many exploratory lines.
Using these little planes is very much like drawing this way. That is why I find them so satisfying. When you want to reveal a harmonious curve, or a transition (as on the heel of an instrument neck), the plane is the charcoal, linking the brain through the gesture in finding the edge, volume or shape. A larger plane removes a flat wide swathe, but these remove long thin ones, so there are lots of arm repetitions and gestures which allow you to feel the shape becoming more refined. The thin line also removes difficult timber with less tear out and resistance.
Did I ever mention that I love nice lines?
Thanks for the revelatory story. Great little collection.
ReplyDeleteA pleasure, PR.
ReplyDeleteHad no idea you casted your own tools. That's a fascinating post, especially as the last several 'graphs reveal the reason and reward for go to all the trouble. Some people would just say, "They work better."
ReplyDeleteAnd the guitar looks amazing.
Thanks Barry, I think designing them was tougher than making or talking about them! I look forward to seeing what you get up to when the weather turns you indoors again.
ReplyDeleteWow very cool Mr. Ditterich and thanks
ReplyDeleteQuite a process to make those little planes. Thank you for sharing.
ReplyDelete