Wednesday, November 30, 2011

value and values in instruments

The  particular tone in the voice on the phone was not recognisable as a specific person , but as a circumstance  familiar to me in my work. An 'expensive' instrument with multiple joint failure. The cello neck had broken off, the fingerboard had also come adrift, there was chaos and what could be done?

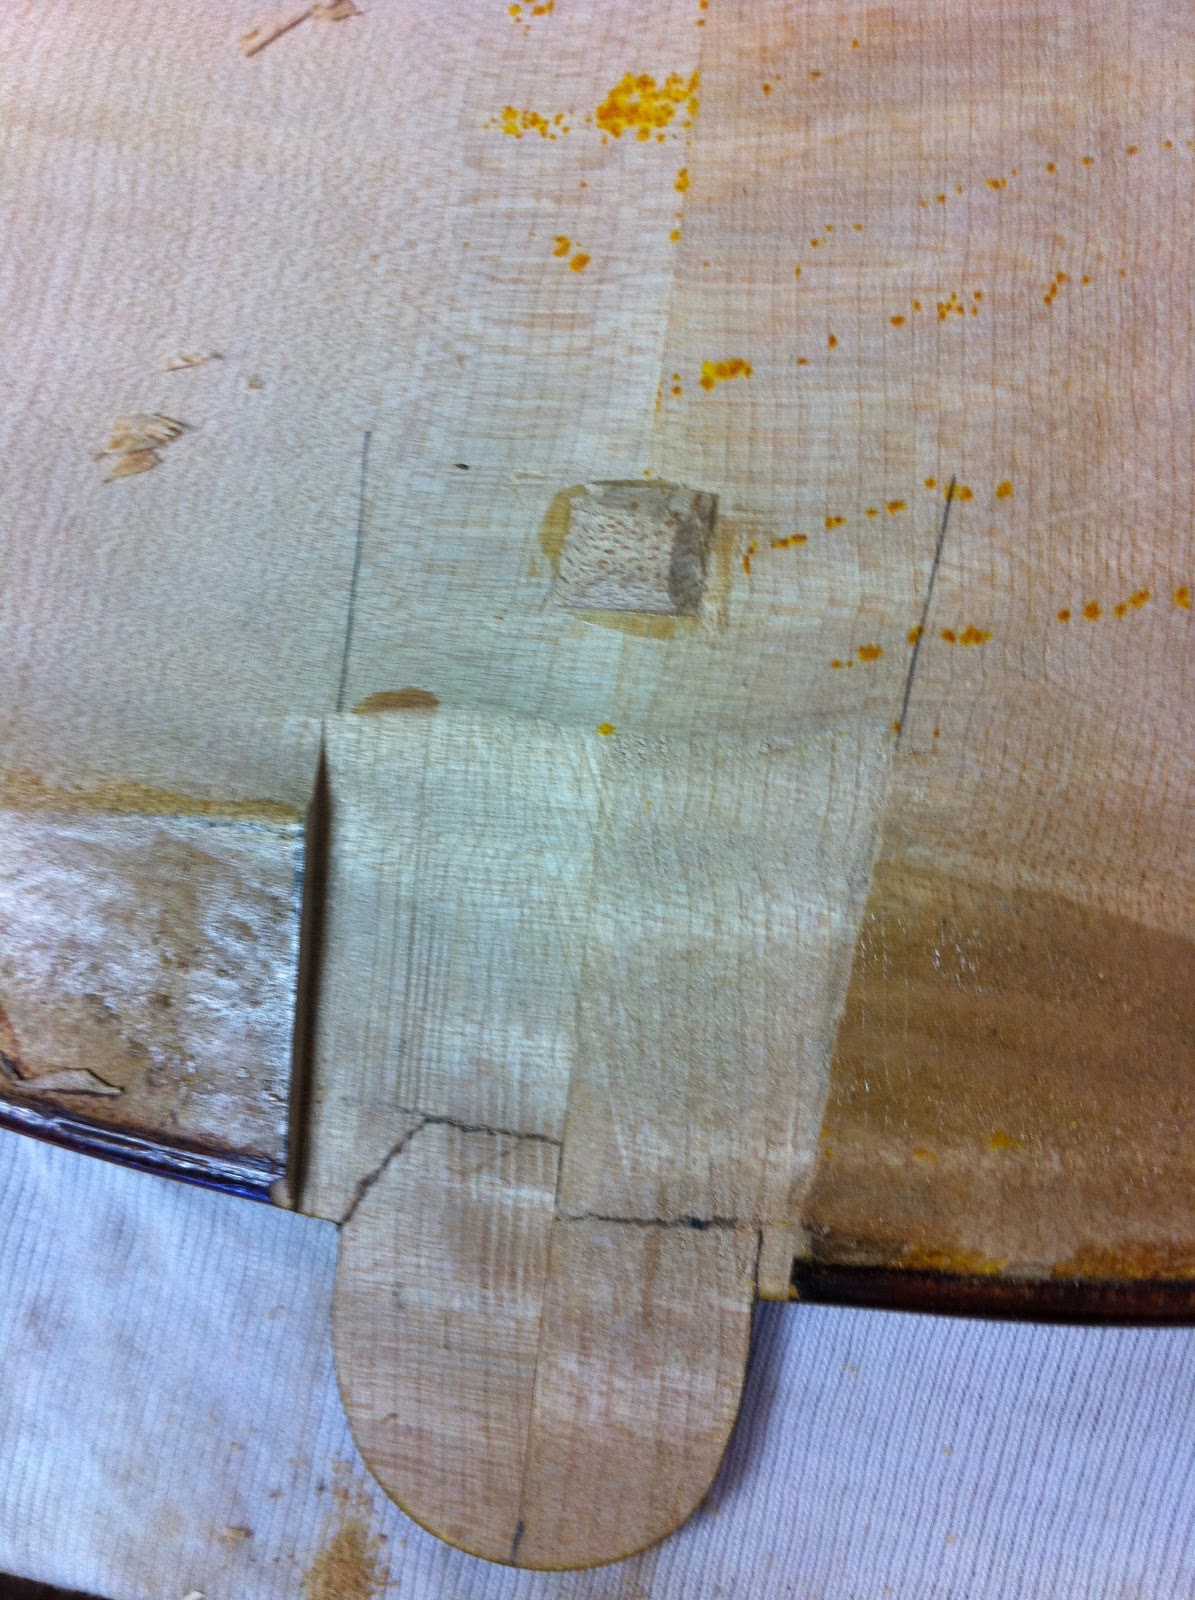
On examining the instrument I found that the little part of the back plate called the 'button' had also broken at its weakest point, where the purfling cuts across it. Now this little piece is the part of the back that takes a substantial part of the pulling force of the strings, as they try to swing the neck heel upwards, and the fingerboard down. Despite the fact that the neck heel is buried in a sliding single dovetail joint of considerable size, the button is important.

The traditional repair for this failure involves the removal of the back, the re-connection of the button, and the removal of half of its thickness in a graft of new timber on the inside surface of the back. It is an expensive operation, and it costs more than the purchase price of many student cellos. So most cheapies are simply cleaned up, re-glued and sent on their way on the understanding that the repair may last for some years, but it can't be guaranteed. It is only undertaken to keep the cheap instrument working a bit longer, and to save the owner some money and grief.


 Further examination of this cello revealed something of our modern dilemma. It is a stylish, impressive looking instrument, made with quite lovely materials, and made accurately in general so that it plays and sounds good.

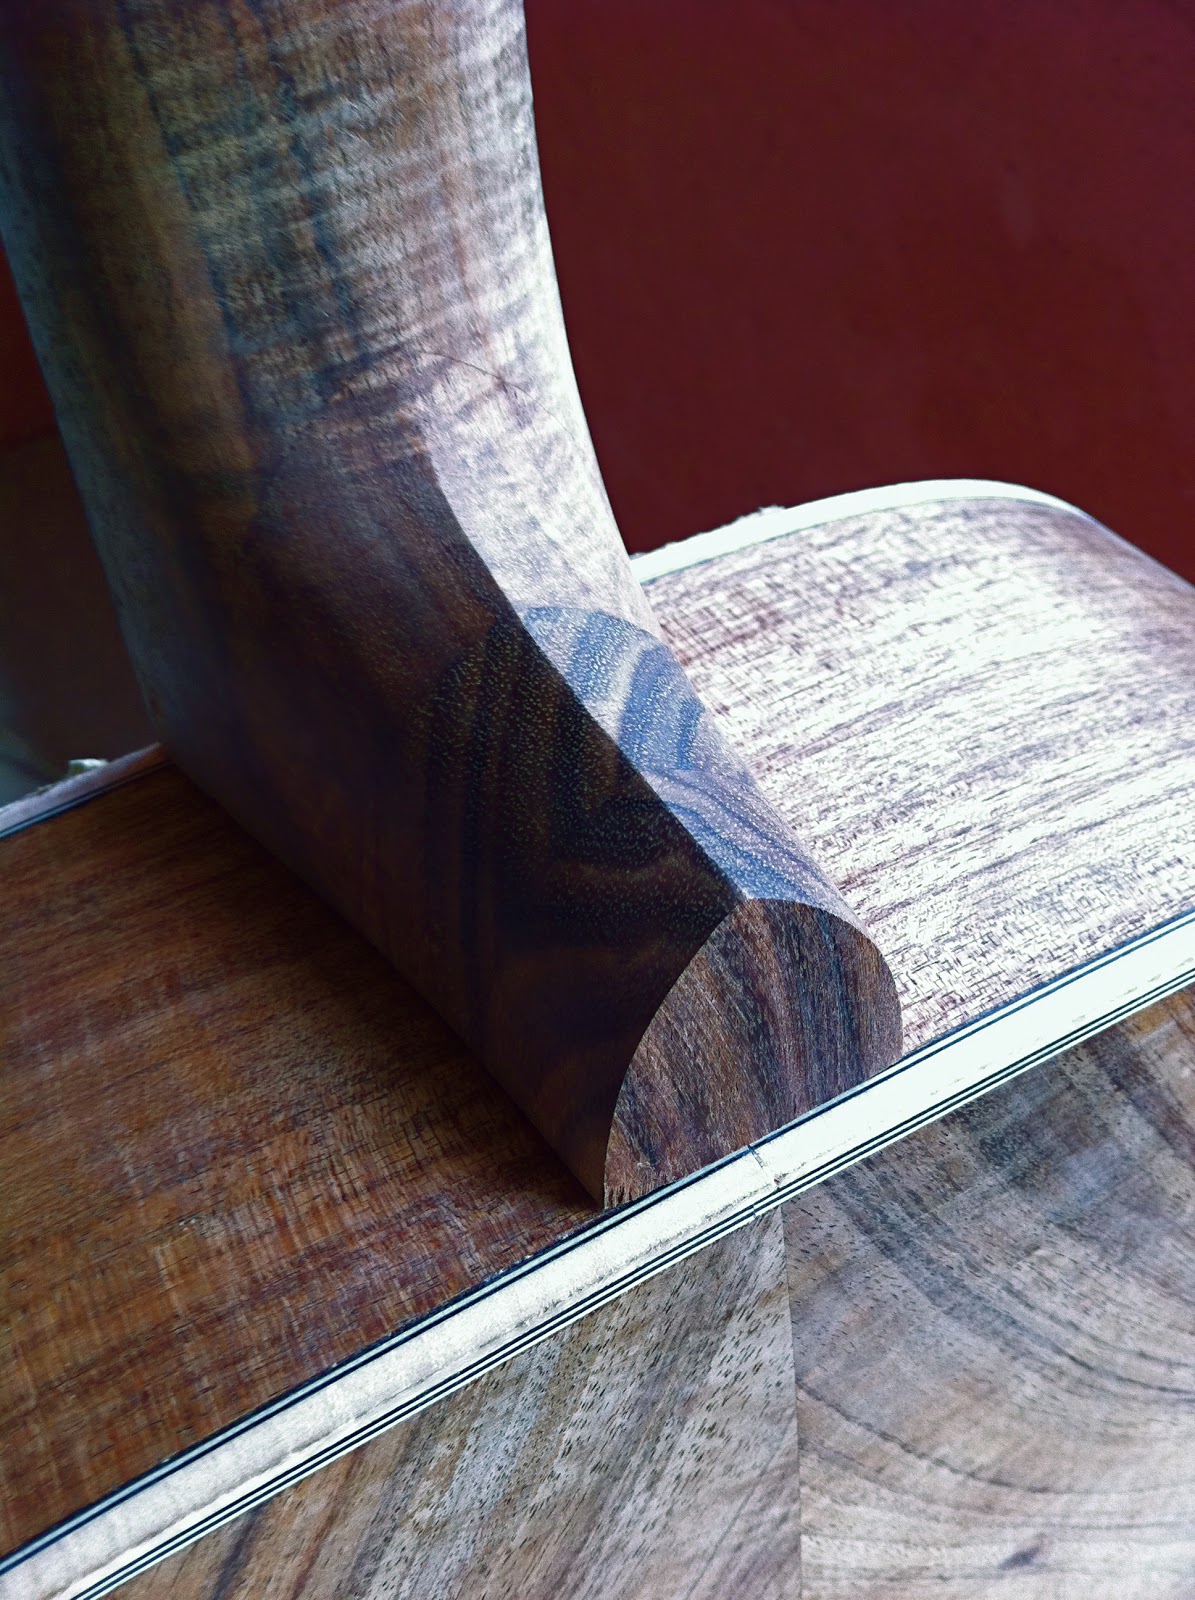
 Look at the spruce top block in the above pic, and in the one below, the lighter patches on the gluing surface of the neck heel. These shots tell us that although the joint pieces are very well made out of good materials, the actual jointing surfaces have made very little contact with their mating surfaces. The neck heel has been held by less than one percent of it's area. These joints were always going to fail. No question. Guaranteed- this instrument was a self-destructing disappointment just waiting for it's moment.


 The button is carefully removed from the neck heel and  re-attached to the back plate.

 About half the thickness of the back is removed to accommodate a graft of suitable timber across the break, shaped in such a way as to resist pulling forces.


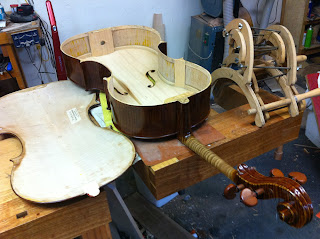
The neck was then glued into the renovated top block, and then the instrument is reassembled. Quite a few processes have been omitted here for simplicity.


It really troubles me that so many things are made this way. They are a waste of lovely materials and are always going to create frustration. This wasn't a cheap cello (about $6000), but it and its ilk make it more difficult to sell good ones made by people who delight in trying to do things nicely.

Wednesday, November 23, 2011

a bit of a strum..


I took my newly finished guitar to a lesson. I poked my phone at my guitar teacher when he first picked it up, and grabbed a little video. Maybe I can convince him to demonstrate with some forewarning one day...

Monday, November 21, 2011

playing and a little bit of surface work


Well it sure is a joy to have a nice instrument to play. Even given my limitations as a player, an open string or a chord can give pleasure when it is clear and nicely pitched. So practice is more pleasurable even on repetitive work.

I've spent a little while on the finish, removing some blemishes and polishing some edges, and quite a few little details that could be accomplished without removing the strings....it's not that I'm lazy about that, but I'd rather be playing at the moment. The curly maple bindings have a little more 'zing' now, and the overall finish has had some of the gloss knocked off. One day I'll remove the tuners and re-level the finish of the headstock. It looks very satisfying from most angles in most lights, but there is just that one angle of light that shows my characteristic impatience...

At the risk of boring my few readers, I've included more pics of details here, mainly to show the effects of different lighting on the timber. These details reveal the limitations of my digital camera though because, for example on the bindings, it is very difficult to show the sparkle in the grain without over-exposing it's shine.


Friday, November 18, 2011

now, something to play


The first 24 hours after fitting the tuners, saddle and nut were not without some ambiguity of feeling. First, as the tasks become more singular and focussed, the impact on playability increases. Second, I'm not a competent player and I'm used to a classical guitar, with wider, flatter fingerboard and a different neck and scale length. It was always a tempting thought while making this instrument, that it would contribute to the quality of my playing, and despite the obvious fact that this would not be an instant thing, one always hopes somewhere in the depths of the brain, that despite all logic the thing being made will be somehow magically transformative.

So, while bringing the set-up to an increasing level of comfort and tonal performance, there was a certain impatience combined with the normal feelings of being overwhelmed when the list of things to do has been reduced to really important refinements.

The first thing I observed when plucking the first and sixth strings (these alone to begin with, while I set up the height and shape of the nut) was that the treble was clear and the sustain was fabulous, but the bass and the 'attack' were as restrained as I had expected from a collection of bits that had been together for such a short time and whose union was being placed under the first strain and pressure. Also, they were subdued by an uncured varnish.

I snuck up on the action, to bring the nut grooves and saddle from a conservative height to a more manageable one, to make sure that the neck was not going to misbehave under tension. It didn't. So down came the action.

The most recent adjustment to-day was to lower the treble side of the saddle and to fine-tune the shape of its top working surface. These adjustments were simply incredible in what they achieved not only in playability, but in clarity of tone. Intonation seems really good so far. First checks at the twelfth fret indicated the correct relationships to the open strings.  Meanwhile a night of coping with pressure has unified the structure and the volume- particularly of the bass -has increased unbelievably. Happy camper.

The finish is still fairly pedestrian and will stay that way for a while to allow the varnish to cure. 


Sunday, November 13, 2011

i'm beginning to fret...


There is an airbrush under my bench, and a spray gun at my other workshop, but it seems more appropriate for this instrument to brush the finish, filling the pores the slow way, with varnish- cutting it back after each coat or so.

It might look flashy in these pics, but the finish is way off an acceptable standard when seen in the flesh. It will always look a bit hand done, but I'm happy for that to be what I'm about. I'm used to living with my own inadequacies, and it isn't necessary for me anymore to strive to work like a machine, or to produce a finish that attempts to look like machine work. (handy, really, because a $50 guitar has a flawless spray varnish and one could become depressed at the thought)

So, the varnish is going on in layers, but I've also fretted the fingerboard today, and it didn't seem like a very photogenic process, so there are no details here apart from the first five frets on the pic above left.

There is a lot of specialist and trade-secret-sort of knowledge about fretting. It does seem odd to have anything on a fingerboard after my last few decades of naked ebony curving in all directions with scarcely a straight line to bless itself with. Setting the heights and shapes of the frets will take more work than banging them in did, but I'll enjoy all that because it is in these details that I'll create the sort of action that will suit.


Tuesday, November 8, 2011

first flash from the can


There should really be some pics here of the neck carving process, but the first sealer coat on the back and neck prompted these as a post instead.

This was intended just to be a protective coat to keep things clean and a bit harder while the fretting and set up gets underway.


Monday, November 7, 2011

sometimes wood is just too earnest


I always assumed that when it came time to make fret markers that they would be made from a suitable, beautiful timber, but when push came to shove, I wanted something lighter. To remind me to lighten-up, sometimes. Wood has so much ego...it pushes forward and can be too forthcoming with sentiments like- 'I am important and worthy', or 'I am from recycled meaningful bits of his collection', or  'I'm so much more sensible than some flashy modern thing'. And most of the time it is right to say all those things. So this is about context.

I needed to mark certain fret positions, and it seemed fun to make them sparkly. Goodness, what have I come to?
 But first, the truss rod found it's place today. That little channel finally got filled. The adjustment is accessed from a hole in the top brace, through the sound hole.


The fingerboard became convex and ready for some inlay. First, some pilot holes were drilled for the abalone...

Then the holes were enlarged to the right shape....


Then the bits were glued in, and are not quite finished yet in these pics because I've already done way too much today.

At this point they seem a bit disjointed, but the frets make sense of all that....later.

Saturday, November 5, 2011

the two become as one


 There are lots of ways to attach a neck on a steel stringed guitar. Perhaps the most in keeping with modern usage and repair techniques is the double bolted flush fit with the capacity for adding shims for adjustment. Bolt heads are accessed from the soundhole and it all works very well with machine-made components. Some manufacturers use a pinned mortise and tenon and some still use the tapered single dovetail, as I have done here.

I think if I were to make a few guitars, I'd probably consider the bolt-on method, unless someone was wanting to pay for the premium sort of artefact. I chose the dovetail here because it is part of my 'story', and it befits the attempts I am making to have as many metaphors and minor symbols of historical importance to me incorporated into its fabric and shapes.


 The bottom of the heel, or button as it is sometimes called is often covered with a contrasting layer, and if I were to do that with this instrument it would be ebony, to harmonise with the blackish trim elsewhere, but I'm thinking of leaving it natural- in Julia's terms; 'less is more with THAT back'.
The neck is still 'in the rough' until the fingerboard is fixed on.

Wednesday, November 2, 2011

where did the time go?

A long day alone and the last thing I can remember is breakfast. This is quite physical work, and once it started to consume me I lost all sense of time. I started the binding yesterday, working on the back, and making more than my fair share of mess, and spending many sessions at the honer sharpening my scrapers. The pic below is of my little Dremel tool in it's routing outfit. 

Because the plates are not flat, the routing needs to be done with some extra care, and the back in particular needed to be further cut with a hand purfling cutter and chisels to make up for the  inadequacy of this routing outfit in dealing with the angles, mainly at the top of the bout.

Above, the back purfling is sitting in its channel, and the binding channel sits empty for the moment.

  Above here, purfling and binding are in their grooves, and so am I. The masking tape is very handy, and has some spring in it when pulled tight.


 Above, the belly having the purfling groove routed in 4 or 5 thin passes, before the binding rebate is cut on the outside. To keep the spruce from splintering you need to be aware of the direction of the grain, and work downhill, but with the added complication that the direction of rotation of the machine will make it want to bite, or run off un-controlled in one direction. Concentrating and not answering the phone helps, and so do a sharp blade and very incremental cuts.


 These two shots show the two stages of rebate on the belly. Top, the deep groove for the width of purfling I chose, and below, the side rebate for the purfled maple binding.


Below, the belly purfling. The maple binding is still un-trimmed, and therefore very thick in this pic. At this point, I had only worked on bringing the top surface down flush, using the usual suspects and a flat scraper. So that outer maple line will end up much thinner. You can see in this pic that the belly was sealed before all this palaver, to protect the surface from nasty fingernails and router bases. Some of the sealer has come off with the levelling, and more will soon too as I prepare the surface for finishing.


It looks smaller and more finite with its framing edges, and there is also a more delicate and difficult-to -describe feeling here too- that, after all this work, somehow surprisingly, it is still just a guitar.